We’ve been talking pizza here the last few weeks. We talked about a few pizza game changers you can use to improve your homemade pizza.
And I shared our favorite homemade sauce recipe. It’s easy and simple so that’s an added bonus.
Today I’ve got a pizza dough recipe for you to try. This is not a quick dough to make, but it is worth the time. I adapted this from the free Craftsy pizza making class. Mostly, I simplified and clarified the recipe. The original recipe calls for measuring everything on a scale.
While I’m sure using a kitchen scale will yield more consistent results, I’m resistant for a couple of reasons. First, I don’t own a scale and I know many (probably most) of you don’t either.
And second, I think there’s something to be said for learning to trust your own judgement when it comes to working with any type of dough. There’s a satisfaction in making something enough that you begin to know when it needs more flour or when it could use some water. When to leave the dough to rest a while and when to keep working it.
I’m still in the process of learning to really know my way around the pizza dough, but I am learning.
Before I share the recipe, let’s talk over a few tips.
Make the dough at least 24 hours ahead of time, if possible.
Pizza dough likes a long resting time for the gluten to strengthen. That said, I have made this dough the same day as baking it. I didn’t refrigerate it, but left it on the counter in small bowls. It rose quite a bit during the day, so I had to punch it down and reform into balls part way through the day.
If you make the dough ahead of time, store it in the refrigerator. Then be sure to get it out and let it come to room temperature before working with it. Bringing it up to room temp takes several hours.
You can also freeze the dough. Thaw in the fridge and bring to room temp before baking.
Use good quality bread flour.
For the best results, use good quality bread flour. I like King Arthur brand. I’ve also used White Lily bread flour and had great results with that. I’d love to order some 00 pizza flour sometime, but for now it’s nice to be able to buy flour in the grocery store.
Allow about 30 minutes to mix the dough and get it ready for the fridge.
It only takes a few minutes to mix the ingredients together, but there are several times that you need to let the dough rest. The hands-on time is minimal, but the entire process takes a while.
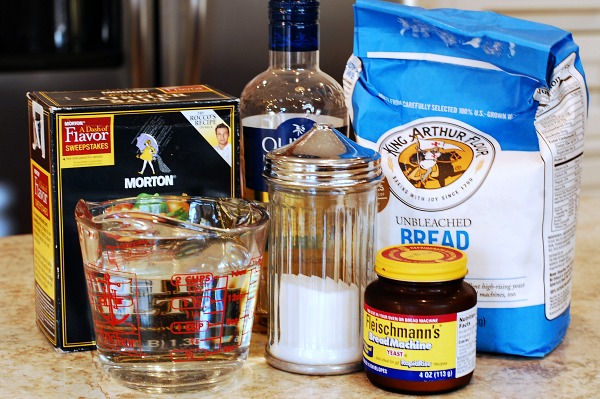
Here’s what you’ll need:
How to Make Homemade Pizza Dough
Ingredients
- 5 cups bread flour
- 2 tsp. Kosher salt
- 2 tsp. sugar
- 1 Tbs. olive oil
- 1 1/4 tsp. Rapid Rise yeast dissolved in 1/4 cup warm water
- 1 3/4 cup water
Instructions
- In a mixer bowl (or large bowl) stir all ingredients together. This can be done with electric mixer or by hand.
- Mix until well combined then let the dough rest a few minutes.
- Mix again and check to see if it seems too wet or dry. It should feel moist and a little sticky, but not wet. Add a bit of flour or water if needed.
- Pour dough out onto counter that you've oiled with olive oil. Press dough out flat with your fingers. You aren't trying to make the dough thin here, just spread it out a bit.
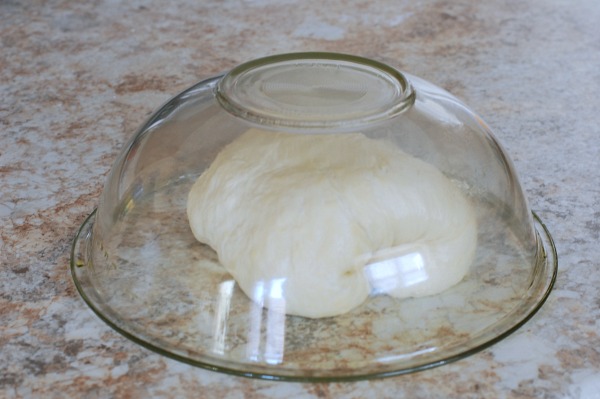
- Fold the sides to the middle. Turn the dough and fold the sides to the middle again. Tuck all the folds under and let dough rest on counter under a large, oiled bowl for 5 minutes.
- Repeat the press, fold, rest steps 3 more times.
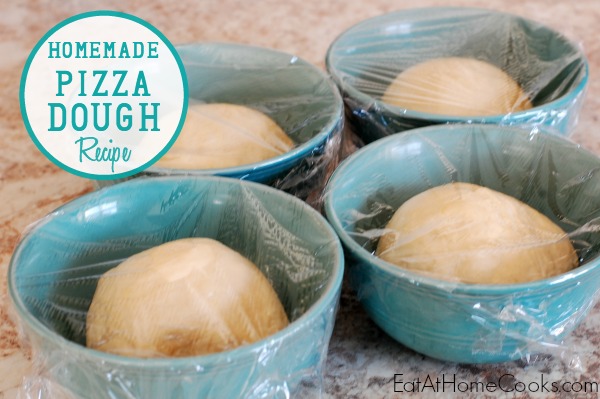
- Use a knife to cut the dough into 4 sections. Form each section into a round ball and place in a round bowl or container covered with plastic wrap.
- Refrigerate or freeze until ready to use.
- Bring to room temp before using.
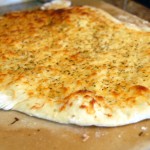
- Top with favorite toppings and bake on pizza stone, pizza steel, iron skillet or pizza pan at 500 degrees for 10 or so minutes.


I have to say that I was reluctant to get a kitchen scale too. But one day I found a rather inexpensive one, and I am so glad that I got it. While having “dough” sense is good, I was surprised by how many uses I have found for it over the years:
– cooking/baking (of course) – lots of places this has made things faster and easier
– weighing an envelope to see if it needed extra postage (saves me a trip to the post office)
– weighing things for multiple science fair projects (what a lifesaver sometimes)
– helping my kids understand the relationship between grams, ounces, and pounds when working on weight in class
– the kids love to play with it just to get a better idea of what things around them weight to develop the skills to estimate weight
– getting my kids to help more in the kitchen (for example, they can’t eyeball meatballs well, but they love to use the scale to help them roll even ones)
Those are great uses for a kitchen scale! Thanks for sharing 🙂
How many does this recipe feed? If I wanted to have a make-your-own pizza party, how many would I need?
Anne
I get 4 pizzas out of it and that feeds about 8-9 people. We don’t have anything else with it to stretch it though.
Your recipe form is very incomplete. I use Living Cookbook software to save my recipes. Your forms do not include enough specifics about servings and yields to suit my needs. Additionally, specific times about the preparation and cooking would be beneficial. Nutritional values per serving would also be helpful..
Thank you for the pizza dough recipe it was great,
and I need to know what is the flour No.00 and is’t possible to mix it at home .
regards,
I’m glad you liked the dough. I haven’t tried the 00 flour yet. You can get it from Amazon, but it’s not something you’d find in a grocery store.
00 flour is a type of flour. It is also used to make pasta. It is VERY fine. You can find it at Italian markets or specialty stores as well. I use it to make homemade pasta.
I’ve worked for years to find a good pizza crust to make at home that my family loves, finally figured it out last year and now my family refuses to eat pizza out any more. I wouldn’t normally post this on someone else’s recipe, but you said you were also in the process of finding the ideal recipe. I just use the pizza crust recipe in the Ball Blue of Preserving (I’m a canning & preserving instructor and preserve a lot of what we eat). I make the recipe in my standing mixer, only mix it 2 minutes or until all the ingredients have incorporated and clean the sides of the bowl. Sometimes I have to add a little more water, but it turns out tough if the dough is too wet You can do this by hand too. Then I cover it with a towel in the same bowl I mixed it in and let it rise until doubled, takes about an hour to an hour and a half in my Montana kitchen, depending on time of year. Then I punch it down, place it on a floured counter, cover with towel and let it rest 10 minutes. Then I divide it into equal portions and weight them on my kitchen scale so they’re all the same – I try to get them to be 4.5 ounces each – can add little pieces to get it right. This size seems perfect for one person, or two if having sides. (My son is type 1 diabetic so I have to weigh everything he eats so I can calculate carbs so he knows how much insulin to take, so this is why I’m particular about them being the same – it isn’t necessary otherwise.) I preheat my oven with a pizza stone in it to 500 degrees. I roll out each ball of dough quite thin (probably about 8″ across), poke them all over with a fork so they won’t bubble up in the oven. I put a little cornmeal on my stone and then I par-bake them for 4 minutes each. This part is a little time consuming, but TOTALLY worth the effort! I place them on racks to cool, once they’re all done I top them however we want and bake them for another 5 to 7 minutes each. Options: You can put all the par-baked crusts in the fridge to use later throughout the week, freeze them or top them and then freeze them for instant meals. If I freeze them with toppings I put them on baking sheets, freeze them, then once they’re frozen wrap them in saran wrap. Another way my daughter likes to have hers, is take one of the balls of dough and press it into a small cast iron fry pan, par bake it then top and bake – best ever pan pizza! This recipe makes the BEST, brick oven tasting pizza we’ve ever had. I serve it for guests often because I can have the crusts ready in the fridge and get dinner done fast to leave time for visiting. Everyone who’s ever had it is amazed that I can make that kind of pizza in my little cheap oven in my little farm kitchen. It’s really fun for kids, or adults, because you can do a make your own pizza dinner!
I will definitely try this. I love homemade pizza!
cant wait to try..this…when i go to roll out my crust it always springs back…what am i doing wrong…
I have that problem too sometimes, but this crust works better than others I’ve tried.
I love to cook and bake but so afraid of pizza dough. After reading how easy and yummy this sounds, I’m determined to try it. What have I got to lose? Your pictures are so gorgeous. Thank you.
It’s a great weekend meal that’s hard to mess up, and everyone gets whatever toppings they want if you divide up the dough. ENJOY!